⚙️ Control a Servo Motor with a Potentiometer : Beginner's Ultimate Guide 🤖
Welcome back to electronicmindset.com
If you're a beginner looking for fun, practical Arduino project, then controlling a servo motor with a potentiometer is perfect. This project lets you adjust the servo's angle by simply turning a knob!
It's fun, practical, and perfect for anyone looking to integrate it into large-scale Arduino projects.
So, let's get started!
Table of contents
- Materials You Will Need 🛠️
- Circuit Diagram 🔌
- Write the Arduino Code 💻
- Code Explanation
- Upload the sketch and test you circuit
- Applications
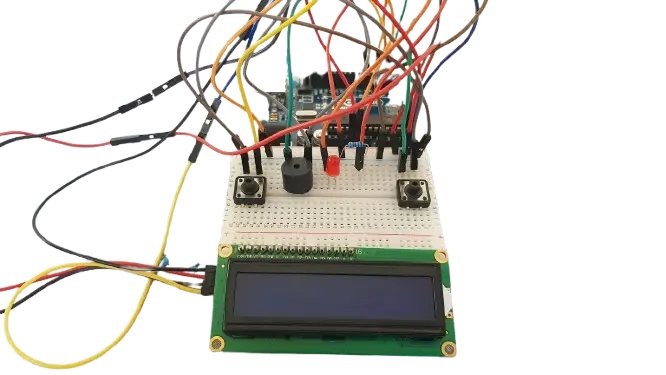
Prototype:
To make this project ,you have to follow these steps:
Step 1: Gather your materials.
You will need:
- Arduino Board (Uno, Nano, or compatible)
- Servo Motor
- 10K potentiometer
- breadboard
- Cable of Arduino
- Jumper wires
- Laptop or computer
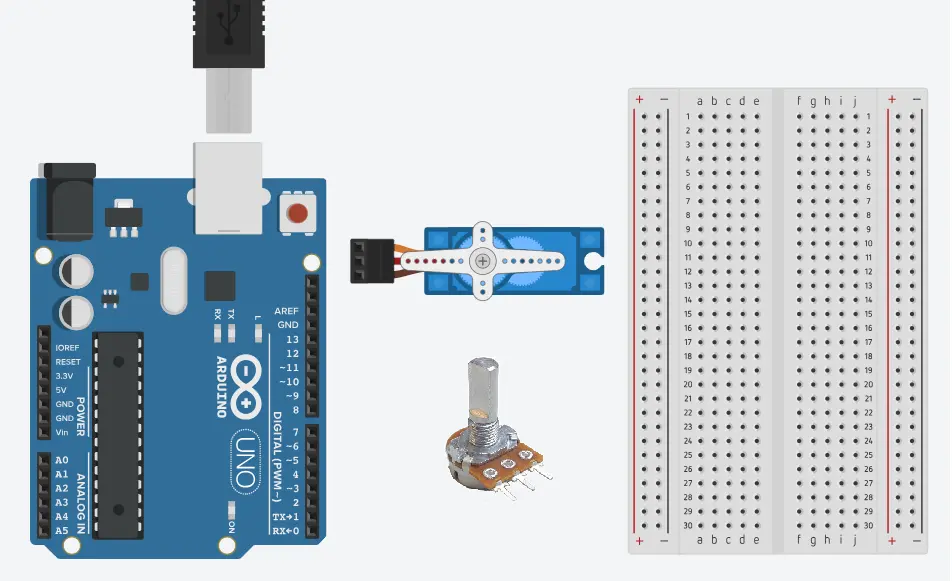
Step 2: Build the circuit.
Building the circuit is an easy task:
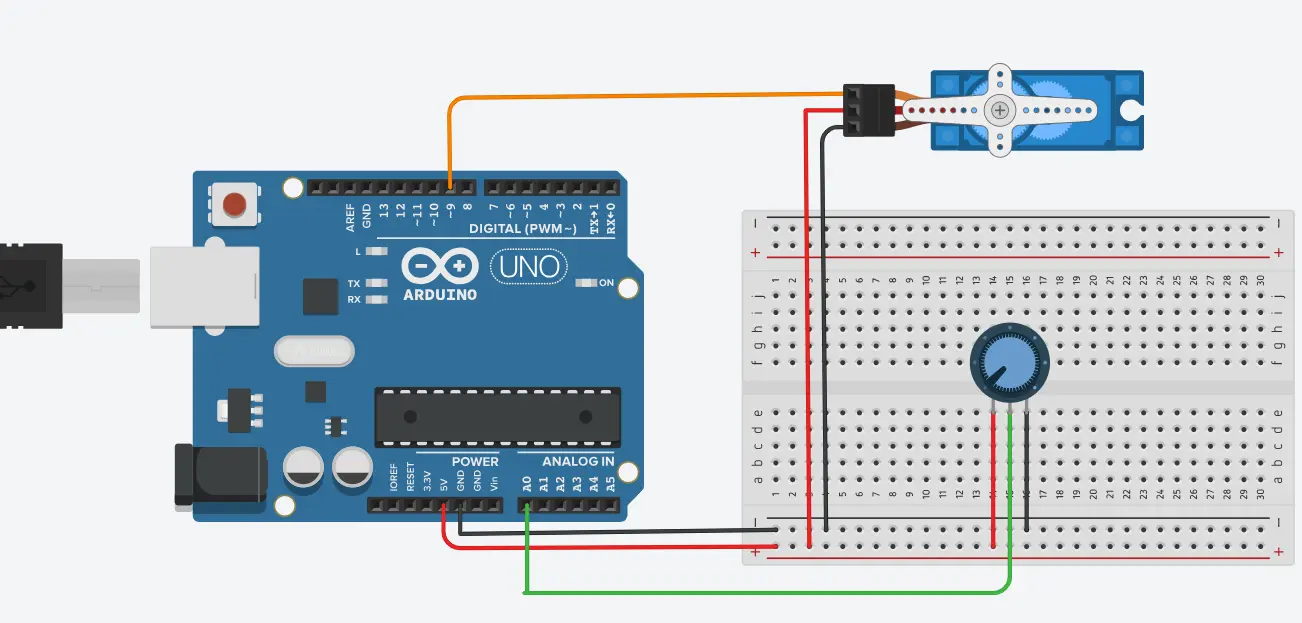
First, connect the servo motor to the Arduino:
red → 5V
brown/black → GND
orange/yellow → digital pin 9
For the potentiometer:
one side pin → 5V, other side → GND
middle pin → analog pin A0
The schematics below will help you build the circuit just in case you don't understand:
Step 3: Write the code
Open the Arduino IDE on your computer, and write the following code:
// Source: https://electronicmindset.netlify.app/projects/control-servo-motor-using-potentiometer


#include <Servo.h>

Servo myServo;
int potPin = A0;
int val;

void setup() {
  myServo.attach(9); // Attach servo to pin 9
}

void loop() {
  val = analogRead(potPin);            // Read potentiometer value (0-1023)
  val = map(val, 0, 1023, 0, 180);     // Convert to angle (0-180 degrees)
  myServo.write(val);                  // Rotate servo
  delay(15);                           // Small delay for smooth motion
}
📝 Code Explanation:
The code uses the Servo library to control the servo motor easily. We first create a servo object and tell Arduino which pin the servo is connected to.
The potentiometer is connected to an analog pin, and we read its value with analogRead().
Since the potentiometer gives a value from 0 to 1023, we use map() to convert it to a servo angle from 0° to 180°.
Then myServo.write() moves the servo to that angle. A small delay(15) makes the movement smooth.
Applications:
You may wonder how this simple project can be applied in real life. It can manually control a robotic arm, adjust the angle of a pan-tilt camera, or operate moving parts in interactive models.
Basically, any system that needs position control via a knob can benefit from this project.
Step 4: upload the sketch
Once your circuit is ready and your code is complete, it's time to upload the sketch to your Arduino board. Follow these simple steps:
First, open the Arduino IDE on your computer and copy our code into a new sketch. Click the checkmark (✓) icon to verify that there are no errors.
Then, go to Tools → Board to select your Arduino type (Uno, Nano, etc.) and Tools → Port to choose the correct port where your Arduino is connected.
Finally, click the right arrow (→) icon to upload the code.
🔋 Use Of Battery
You can power the Arduino via USB or a 9V battery connected to Vin and GND for a portable game.
Test Your Circuit:
After uploading the sketch, try to move the potentiometer, you should see the servo motor moves accordingly with your control of potentiometer !
Well Congratulations 🎉 You've just built your first game using Arduino to test your reflexes and compete with your friends !
Applications:
You may wonder how this simple project can be applied in real life. It can manually control a robotic arm, adjust the angle of a pan-tilt camera, or operate moving parts in interactive models.
Basically, any system that needs position control via a knob can benefit from this project.