Happy birthday song using Arduino Uno
Welcome back to electronicmindset.com
In this tutorial, we will learn how to play happy birthday song with arduino Uno and a "buzzer or a speaker"
So let's start!
Table of contents
- 1. Gather Your Supplies
- 2. Construct the Circuit
- 3. Write the code
- 4. Upload the sketch
- 5. Hear the song
To make this project ,you have to follow these steps:
Step 1: Gather your materials.
You will need:
- 8 ohms Dc buzzer or a speaker
- jumper wires
- breadboard
- Arduino Uno
- Cable of arduino
- 1K potentiometer
- Laptop or computer
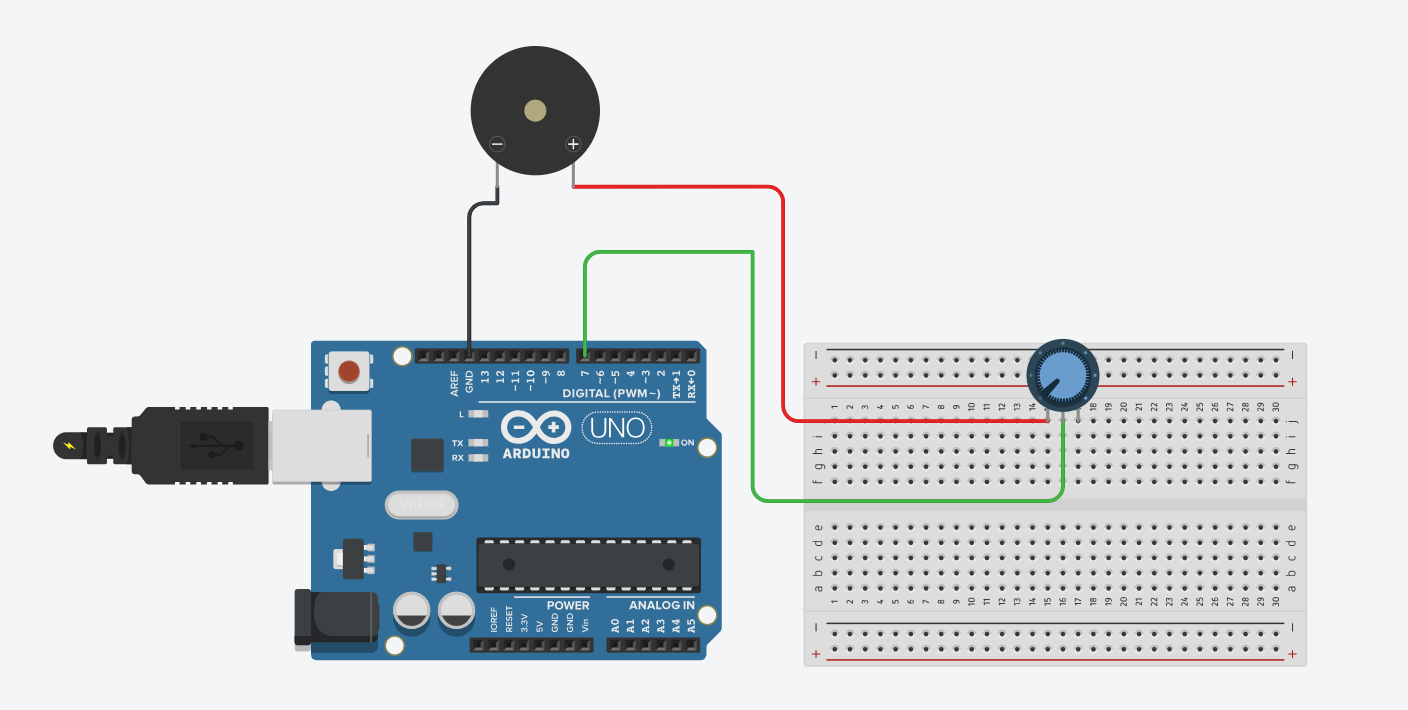
Step 2: Build the circuit.
First, Connect one terminal of the speaker to a digital pin on the Arduino. In the provided code, pin 7 is used.
Then, Connect the other terminal of the speaker to one of the ground (GND) pins on the Arduino.
But if you want to control the speaker volume, you have to use 1K potentiometer , start by connecting one end to pin 7 and the other end to the speaker.
Shematics
Step 3: Write the code
Open the Arduino IDE on your computer, and write the following code:
					int speakerPin = 7; // Buzzer pin
int length = 28; // the number of  notes
char notes[] = "GGAGcB GGAGdc GGxecBA yyecdc";
int beats[] = {2,2,8,8,8,16,1,2,2,8,8,8,16,1,2,2,8,8,8,8,16,1,2,2,8,8,8,16};
int  tempo = 200;// time delay between notes

void playTone(int tone, int duration)  {
for (long i = 0; i < duration * 1000L; i += tone * 2) {
   digitalWrite(speakerPin,  HIGH);
   delayMicroseconds(tone);
   digitalWrite(speakerPin, LOW);
   delayMicroseconds(tone);
}
}

void  playNote(char note, int duration) {
char names[] = {'C', 'D', 'E', 'F', 'G',  'A', 'B',

                 'c', 'd', 'e', 'f', 'g', 'a', 'b',

                 'x', 'y' };

int tones[] = { 1915, 1700, 1519, 1432, 1275,  1136, 1014,

                 956,  834,  765,  593,  468,  346,  224,

                 655 , 715 };

int SPEE = 5;

// play the tone corresponding  to the note name

for (int i = 0; i < 17; i++) {

   if (names[i] ==  note) {
    int newduration = duration/SPEE;
     playTone(tones[i], newduration);
   }
}
}

void setup() {
pinMode(speakerPin, OUTPUT);
}

void  loop() {
for (int i = 0; i < length; i++) {
   if (notes[i] == ' ') {
     delay(beats[i] * tempo); // delay between notes
   } else {
     playNote(notes[i],  beats[i] * tempo);
   }
   // time delay between notes
   delay(tempo);
}
}
Step 4: upload the sketch
First ,copy the code and paste it, then click on the checkmark icon (✓) on the top left corner of the IDE to verify that your code compiles without any errors.
Go to the "Tools" menu and select the appropriate board type ( Arduino Uno, Nano, etc...)
Then go to "Ports"submenu and select the port to which your Arduino board is connected. On Windows, it appears as COMx, and on macOS, it appears as /dev/cu.usbmodemxxxx.
Once the correct board and port are selected, click on the right arrow icon (→) next to the checkmark to upload the sketch to the Arduino board.
Use of a battery
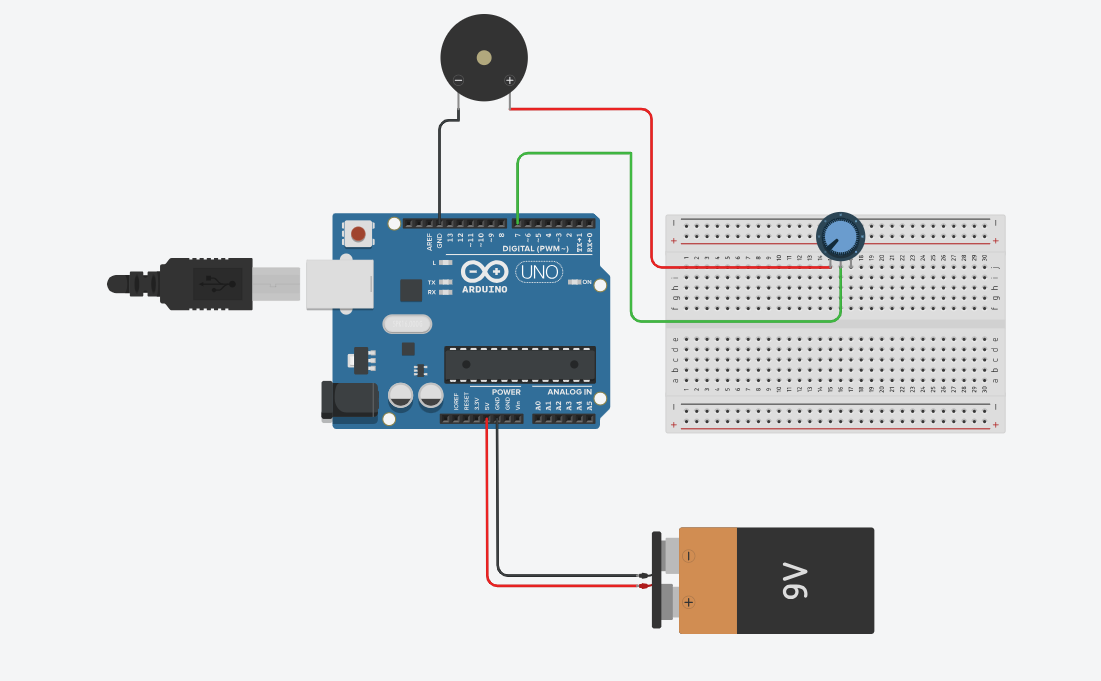
The circuit that we have made is powered by our computer via the USB port.
If want want to power your arduino with 9V battery, make sure the positive terminal is connected to "VIn" pin in arduino and the negative terminal connected to "Gnd" pin.
Step 5: Hear the song
Once the sketch is uploaded, you should hear the happy birthday song coming from the speaker and make sure that the potentiometer is controlling the volume of the song.
That's it! You've successfully uploaded a sketch to play a happy birthday song for your loved ones.
