How to Make an LED Blink With the Arduino UNO
Welcome back to electronicmindset.com
Blinking an LED is like the "Hello World !" program of hardware. It is one of the most popular Arduino program, and all of electronics hobbyists has run it at least once in their life.
In this article , I am going to show you how to blink an LED on Arduino: blinking an LED by turning it on/off roughly once a second. So let's start!
Well here are the steps you need to build this simple project.
Table of contents
- 1. Gather Your Supplies
- 2. Construct the Circuit
- 3. Write the code
- 4. Upload the sketch
- 5. Observe the blinking
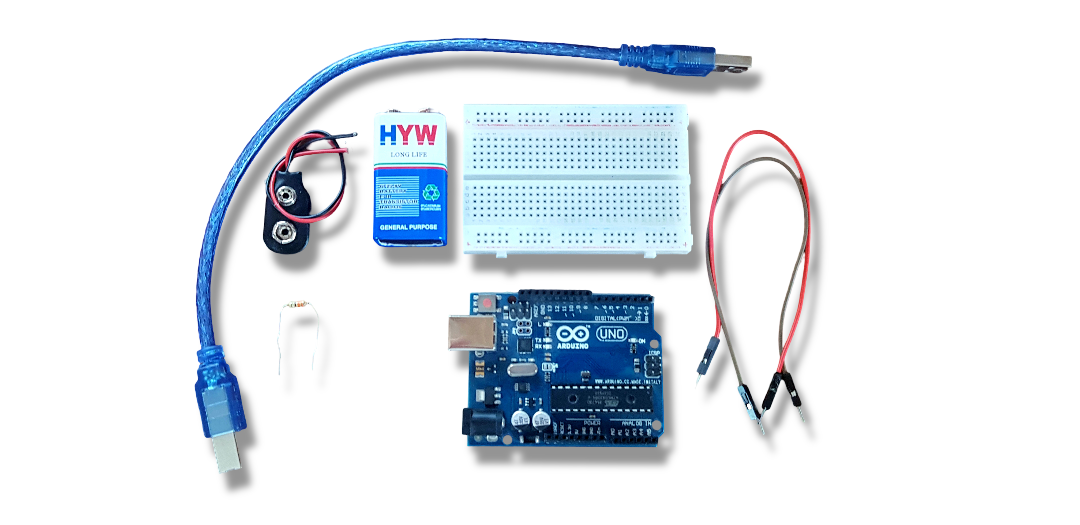
Step 1: Gather your materials.
You will need:
- An led (doesn't matter the color)
- jumper wires
- breadboard
- Arduino Uno
- Cable of arduino
- 220 ohms resistor
- Laptop or computer
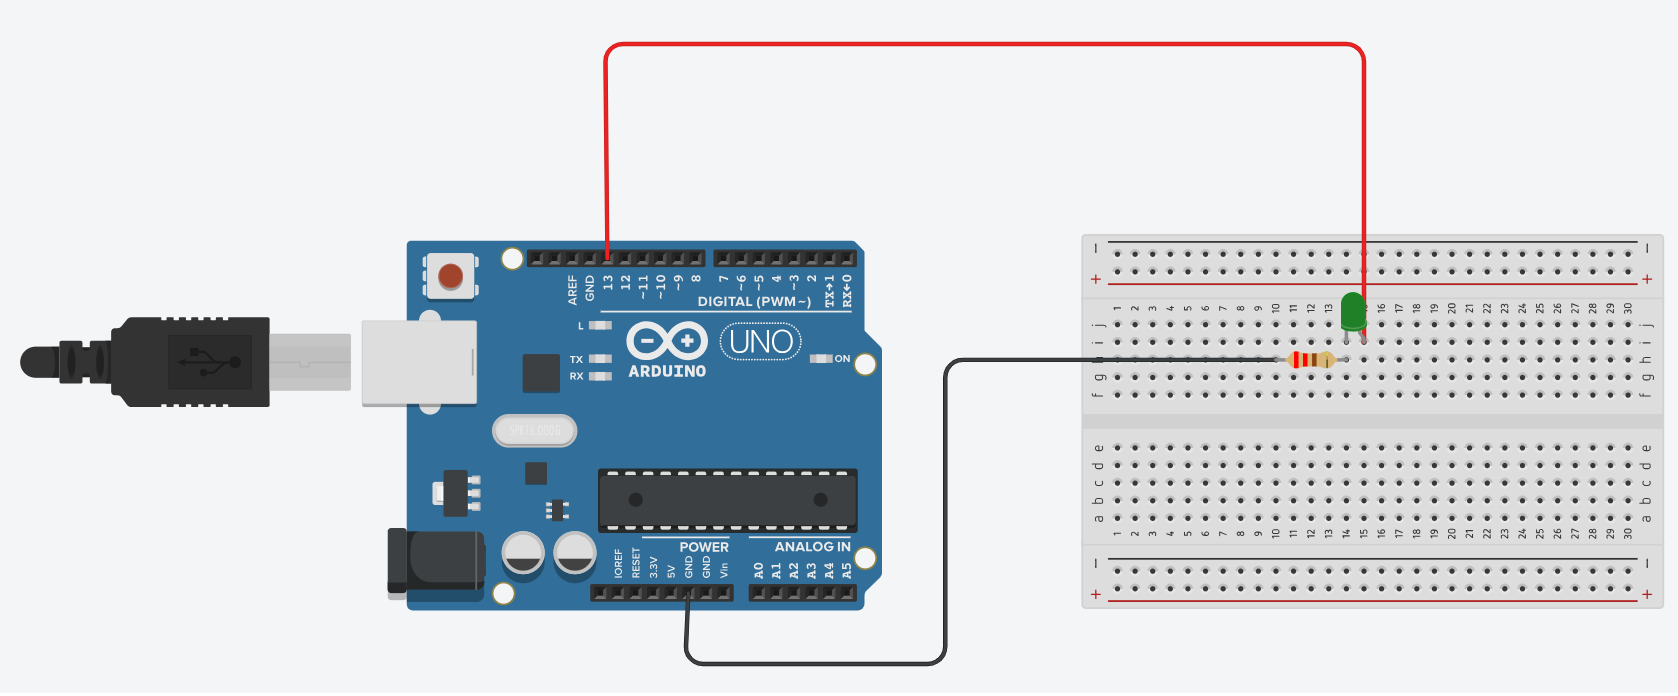
Step 2: Build the circuit.
Place the LED on the breadboard, LEDs have a longer leg (anode, positive) and a shorter leg (cathode, negative). Connect the anode of the LED to one end of the resistor then Connect the other end of the resistor to the digital pin 13 on the Arduino(you can choose any pin from 1 to 13 but you have to modify the code if you want to do that). Connect the shorter leg (cathode) of the LED to the ground (GND) pin on the Arduino.

Shematics
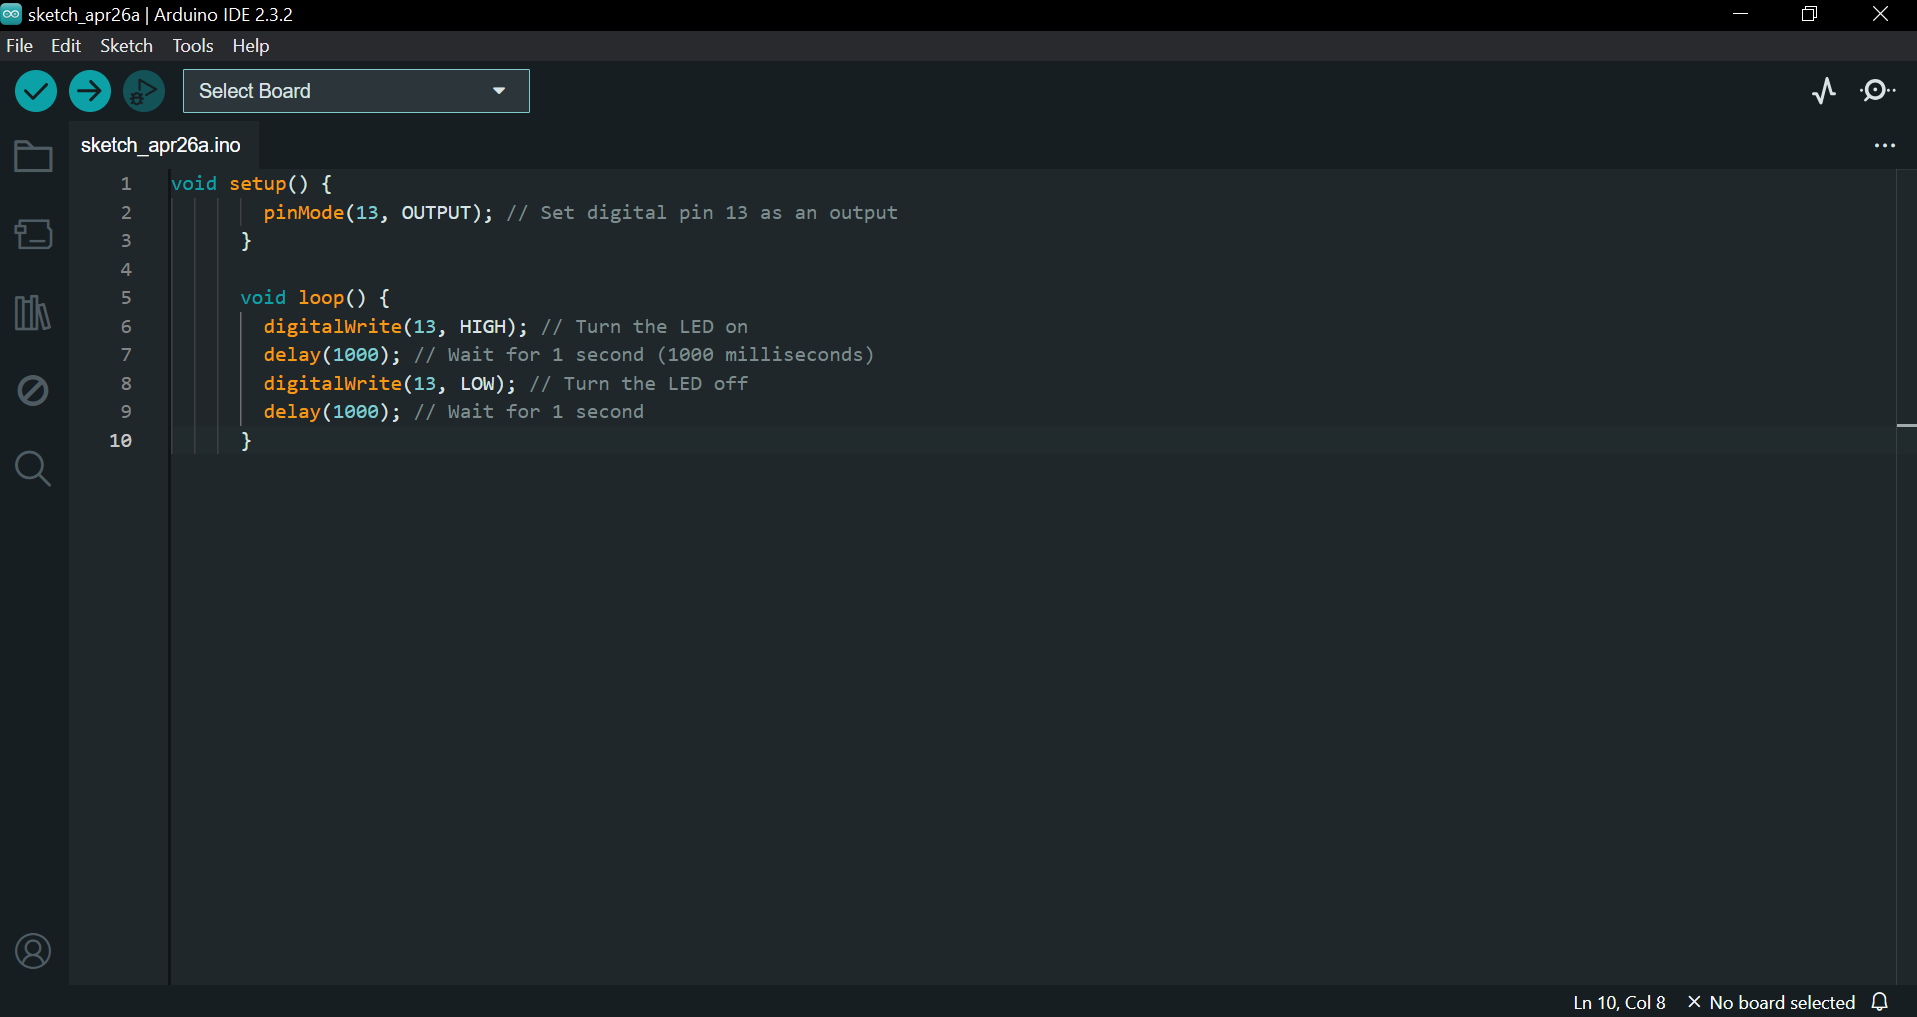
Step 3: Write the code
Open the Arduino IDE on your computer, and write the following code:
void setup() {
			  pinMode(13, OUTPUT); // Set digital pin 13 as an output
			}

			void loop() {
			  digitalWrite(13, HIGH); // Turn the LED on
			  delay(1000); // Wait for 1 second (1000 milliseconds)
			  digitalWrite(13, LOW); // Turn the LED off
			  delay(1000); // Wait for 1 second
			}
The code was pretty straightforward and clear: This Arduino code sets up pin 13 as an output and then continuously turns an LED on and off with one-second intervals.
Here's a breakdown of what each part does:
- void setup(): This function runs once when the Arduino is powered on or reset. In this case, it sets up the pin modes. It sets pin 13 as an output using the pinMode() function.
- void loop(): This function runs repeatedly as long as the Arduino has power.
- Set the pin to HIGH (5V), this will turn the LED on.
- Wait for 1000 milliseconds, or one second.
- Set the pin to LOW (0V), cutting the power to the LED and turning it off.
- Wait for another second, and then repeat everything again.
Step 4: upload the sketch
First ,click on the checkmark icon (✓) on the top left corner of the IDE to verify that your code compiles without any errors.
Go to the "Tools" menu and select the appropriate board type ( Arduino Uno, Nano, etc...)
Then go to "Ports"submenu and select the port to which your Arduino board is connected. On Windows, it appears as COMx, and on macOS, it appears as /dev/cu.usbmodemxxxx.
Once the correct board and port are selected, click on the right arrow icon (→) next to the checkmark to upload the sketch to the Arduino board.
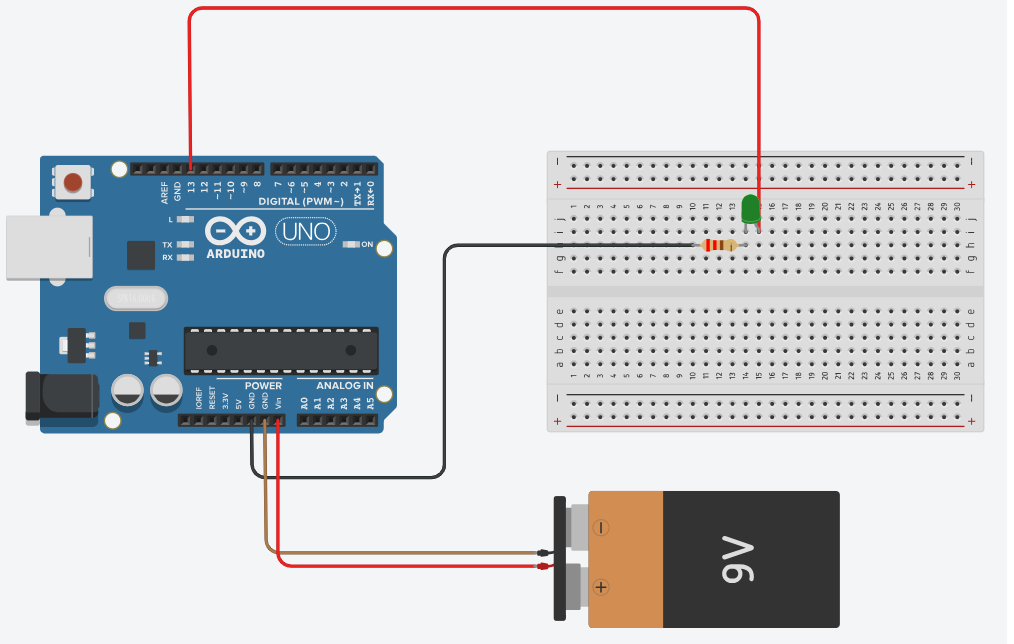
Use of a battery
The circuit that you have made is powered by your computer via the USB port.
If you want to power your arduino with 9V battery, make sure the positive terminal is connected to "VIn" pin in arduino and the negative terminal connected to "Gnd" pin .
Step 5: Observe the blinking
After following all the previous steps,You should now see the LED connected to pin 13 blinking on and off with one-second intervals.
That's it! You've successfully uploaded a sketch to make an LED blink using an Arduino.
