How to make a home security system using arduino uno and ultrasonic sensor ?

Welcome back to electronicmindset.com
Keeping your private things safe from intruders can be a challenging job. But with this Intruder Alarm project, it is easy to keep your accessories safe.
So,In this tutorial,we will learn how to automatically make a home security system using ultrasonic sensor and arduino uno.
In this project, a buzzer will make noise whenever the ultrasonic sensor detects obstacles that are under 40 cm close.
Before starting, we have to undserstand what is an ulrasonic sensor So let's start!
Table of contents
- What is an ultrasonic sensor ?
- 1. Gather Your Supplies
- 2. Construct the Circuit
- 3. Write the code
- 4. Upload the sketch
- 5. Test the circuit
What is an ultrasonic sensor ?

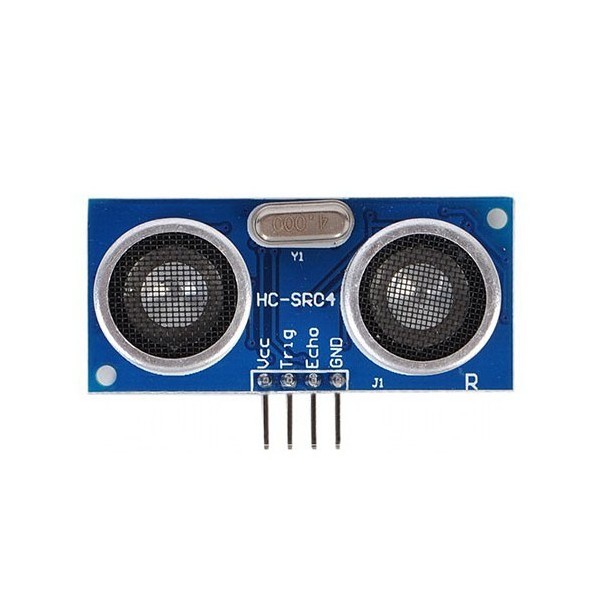
The HC-SR04 is an ultrasonic sensor module which is popular for distance sensing applications in DIY projects with arduino. It has a transmitter that emits ultrasonic waves and a receiver which detects the reflected ones. By measuring the time it takes for the ultrasonic waves to travel to an object and back, the sensor can calculate the distance to the object with high accuracy. It is used in arduino projects like home security system or obstacle avoidance car.
To make this project ,you have to follow these steps:
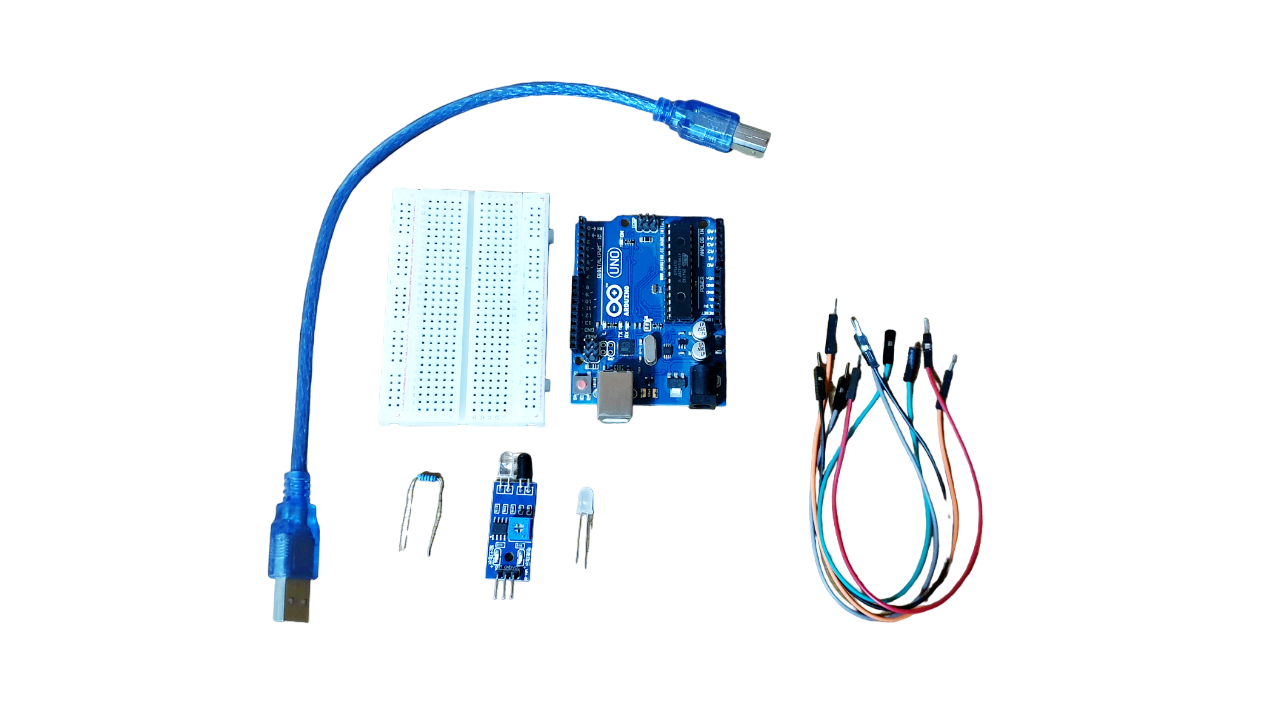
Step 1: Gather your materials.
You will need:
- A red led
- A green led
- breadboard
- DC buzzer
- 2 of 220 ohms resistor
- Arduino Uno
- Cable of arduino
- HC-SR04 ultrasonic sensor
- Jumper wires
- Laptop or computer

Step 2: Build the circuit.
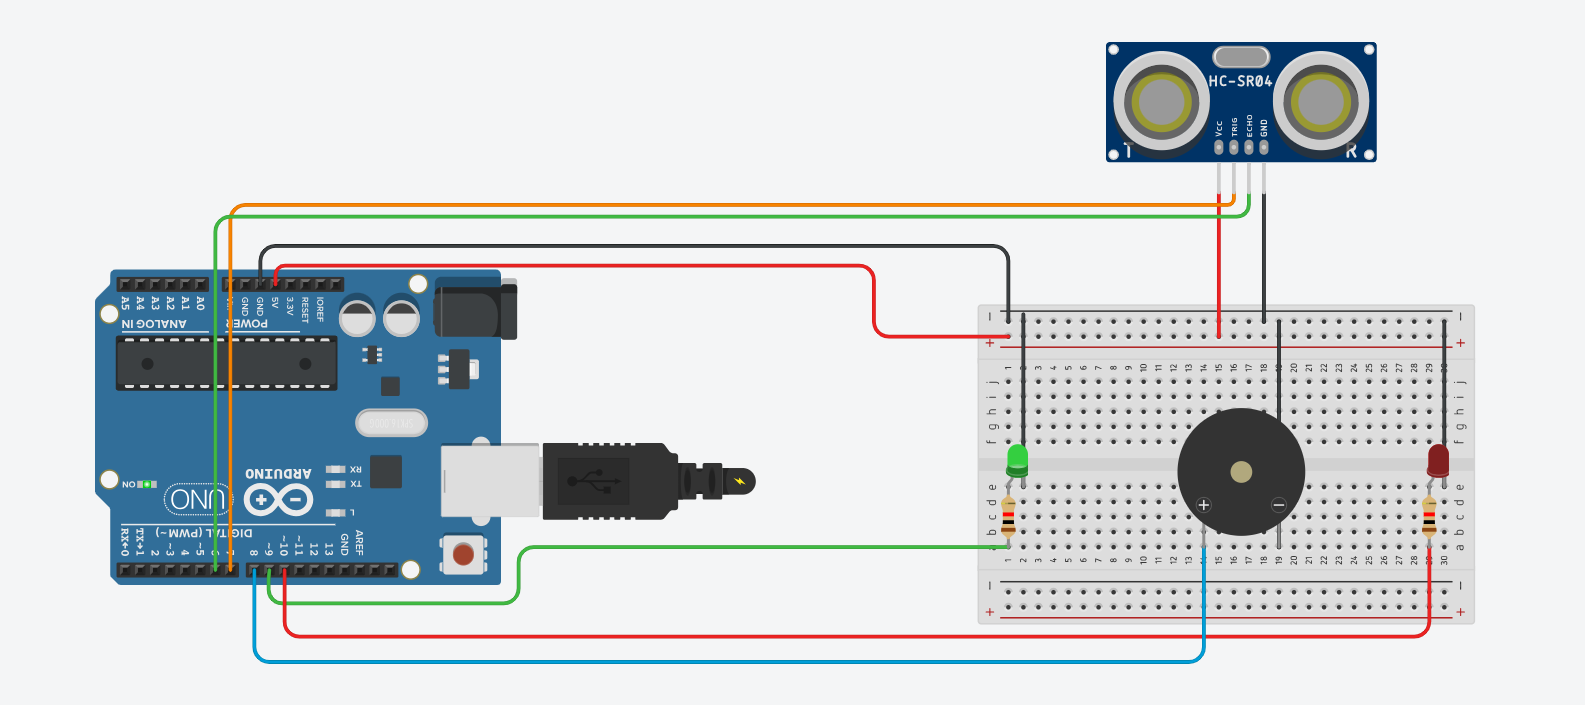
To set up the ultrasonic sensor,place it in a breadboard and connect the VCC pin of the HC-SR04 to the 5V pin on the Arduino, while the GND pin of the sensor must be connected to the GND pin on the Arduino. For the signal pins, link the Trig pin of the HC-SR04 to a digital pin 7 on the Arduino and the Echo pin to digital pin 6.
Let's set up the LEDs and buzzer next. Take the red LED and notice that one leg is longer than the other. Connect the longer leg, which is the anode, to a digital pin on the Arduino, say pin 10. Use a 220-ohm resistor to connect it. Now, connect the shorter leg, the cathode, to the GND pin on the Arduino. Repeat the same process for the green LED: connect its longer leg (the anode) to another digital pin, like pin 9, through a 220-ohm resistor, and then connect its shorter leg (the cathode) to GND. For the buzzer, you'll find two wires: one red is positive, and the other black is negative. Connect the red wire to a digital pin 8 to power it. Then, connect the black wire to the GND pin on the Arduino. This setup will allow the Arduino to control the LEDs and the buzzer .

Shematics

Step 3: Write the code
Open the Arduino IDE on your computer, and write the following code:
					// Pin definitions
const int trigPin = 7;
const int echoPin = 6;
const int redLedPin = 10;
const int greenLedPin = 9;
const int buzzerPin = 8;

void setup() {
    // Initialize serial communication for debugging
    Serial.begin(9600);

    // Set pin modes
    pinMode(trigPin, OUTPUT);
    pinMode(echoPin, INPUT);
    pinMode(redLedPin, OUTPUT);
    pinMode(greenLedPin, OUTPUT);
    pinMode(buzzerPin, OUTPUT);
}

void loop() {
    // Variables to store distance measurement
    long duration, distance;

    // Trigger the ultrasonic sensor
    digitalWrite(trigPin, LOW);
    delayMicroseconds(2);
    digitalWrite(trigPin, HIGH);
    delayMicroseconds(10);
    digitalWrite(trigPin, LOW);

    // Measure the echo duration
    duration = pulseIn(echoPin, HIGH);

    // Calculate distance in cm
    distance = duration * 0.034 / 2;

    // Output distance for debugging
    Serial.print("Distance: ");
    Serial.print(distance);
    Serial.println(" cm");

    // Check if an object is within 40 cm
    if (distance < 40) {
        // Object detected, activate alarm
        digitalWrite(redLedPin, HIGH);
        delay(300);
         digitalWrite(redLedPin, LOW);    // Turn on red LED
        digitalWrite(greenLedPin, LOW); // Turn off green LED
        tone(buzzerPin, 1000);          // Activate buzzer
        delay(300);                     // Wait for 500 milliseconds
        noTone(buzzerPin);              // Turn off buzzer
    } else {
        // No object detected, system clear
        digitalWrite(redLedPin, LOW);   // Turn off red LED
        digitalWrite(greenLedPin, HIGH);// Turn on green LED
    }

    // Delay for stability
    delay(100); // Adjust delay as needed
}
The code was pretty straightforward and clear, This code sets up the Arduino Uno to turn the green led when no obstacle is detected, but once it is detected the red led and the buzzer turn on.
Step 4: upload the sketch
First ,copy the code and paste it, then click on the checkmark icon (✓) on the top left corner of the IDE to verify that your code compiles without any errors.
Go to the "Tools" menu and select the appropriate board type ( Arduino Uno, Nano, etc...)
Then go to "Ports"submenu and select the port to which your Arduino board is connected. On Windows, it appears as COMx, and on macOS, it appears as /dev/cu.usbmodemxxxx.
Once the correct board and port are selected, click on the right arrow icon (→) next to the checkmark to upload the sketch to the Arduino board.
Use of a battery
The circuit that you have made is powered by your computer via the USB port.
If you want to power your arduino with 9V battery, make sure the positive terminal is connected to "VIn" pin in arduino and the negative terminal connected to "Gnd" pin .
Step 5: test the circuit
Once the sketch is uploaded, you should see the green Led turning but once you put your hand in front of the ultrasonic sensor make sure the red led and the buzzer are turned on.
You can make this circuit in your room door to know if anyone is close to the door.
If you want to adjust the sensivity of the ultrasonic sensor you can just modify the "(distance < 40)" to any distance you want.
That's it! You've successfully made your first home security system .

