How to use an IR sensor module with arduino Uno to turn an Led ?
Welcome back to electronicmindset.com
In this tutorial,we will learn how to automatically turn ON and OFF a Light using an Arduino with IR Sensor.
Before starting, we have to undserstand what is an IR sensor module So let's start!
Table of contents
- What is an IR sensor module ?
- 1. Gather Your Supplies
- 2. Construct the Circuit
- 3. Write the code
- 4. Upload the sketch
- 5. Test the circuit
What is an IR sensor module ?
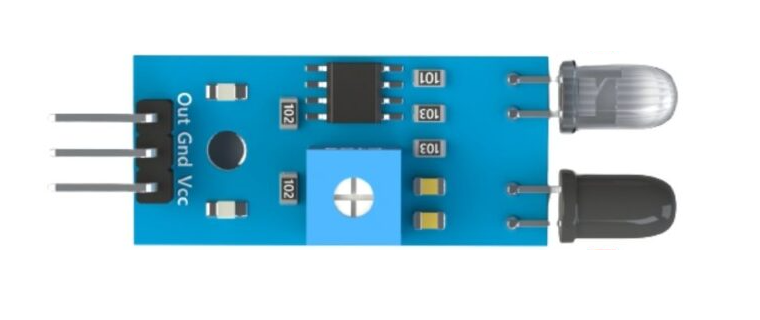
An IR sensor module, briefly, is a device that detects infrared radiation. It typically consists of an IR transmitter (usually an IR LED) and an IR receiver (usually a photodiode which is the black led). The transmitter emits infrared light, which reflects off objects and is detected by the receiver. These modules are widely used for various purposes in daily life as well as in industry. It can be used in line follower obstacle avoidance robot , avoidance car, line count, tracking black and white lines, and many others.
To make this project ,you have to follow these steps:
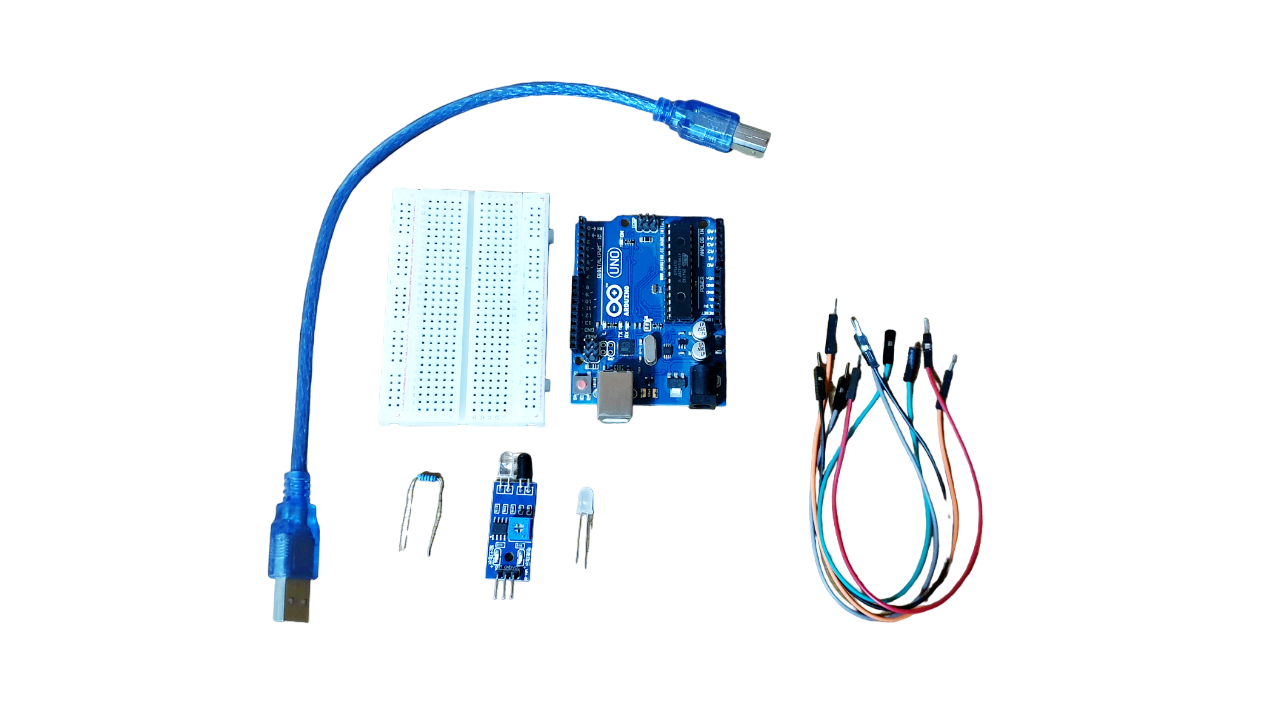
Step 1: Gather your materials.
You will need:
- An LED
- 220 ohms resistor
- breadboard
- Arduino Uno
- Cable of arduino
- IR sensor module
- Jumper wires
- Laptop or computer
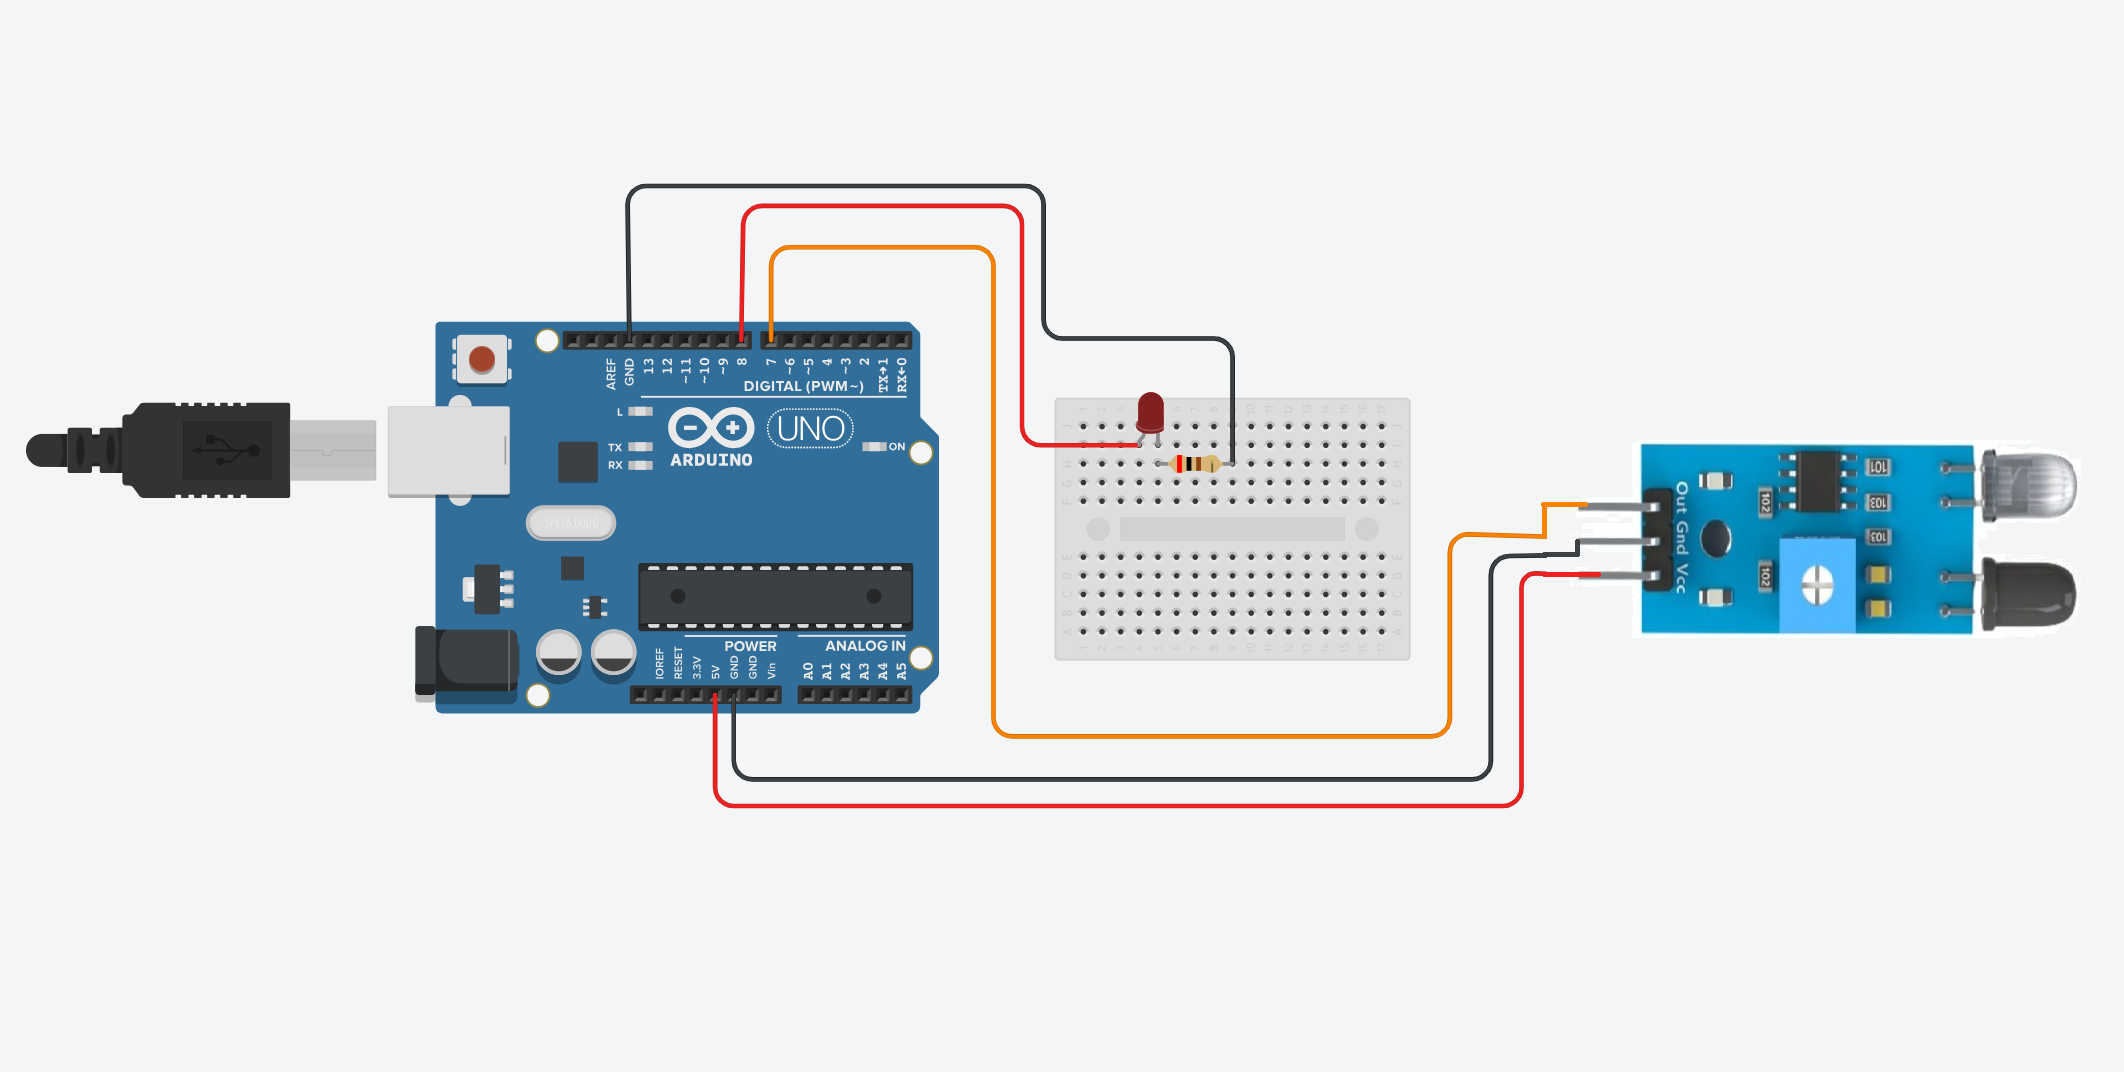
Step 2: Build the circuit.
First, place the LED on the breadboard and connect the longer lead(anode lead) to 8 pin in arduino UNO while the shorter lead(cathode lead) connect it to a 220 ohms resistor connected to GND pin in arduino Uno.
For the IR sensor module , connect the "VCC" to 5V pin in arduino , the "GND" to GND pin in arduino and the "out" lead to pin 7 in arduino Uno.
Shematics
Step 3: Write the code
Open the Arduino IDE on your computer, and write the following code:
					// Source: https://electronicmindset.netlify.app/projects/how-to-use-an-ir-sensor-module-with-arduino-uno
					// Define pin numbers
					const int ledPin = 8;        // LED connected to digital pin 8
					const int irSensorPin = 7;   // IR Sensor connected to digital pin 7

					void setup() {
					  pinMode(ledPin, OUTPUT);      // Set the LED pin as output
					  pinMode(irSensorPin, INPUT);  // Set the IR sensor pin as input
					}

					void loop() {
					  int sensorState = digitalRead(irSensorPin); // Read the state from the IR sensor

					  // The sensor outputs LOW when it detects an obstacle
					  if (sensorState == LOW) {
						digitalWrite(ledPin, HIGH);  // Turn the LED on
					  } else {
						digitalWrite(ledPin, LOW);   // Turn the LED off
					  }

					  delay(10);  // Wait for 10 milliseconds
					}
The code was pretty straightforward and clear, This code sets up the Arduino Uno to turn the LED on and off based on the detection of obstacles by the IR sensor module.
Here's a breakdown of what each part does:
- IR_PIN: Constant variable representing the pin connected to the output of the IR sensor.
- LED_PIN: Constant variable representing the pin connected to the LED.
- setup(): Function that runs once when the Arduino board is powered on or reset. It configures the IR sensor pin as input and the LED pin as output.
- loop(): Function that runs repeatedly as long as the Arduino is powered on. It checks the sensor value and turns the LED on or off accordingly.
- sensorValue: Variable representing the state of the IR sensor.
- digitalRead(irSensorPin):Read the state from the IR sensor
- digitalWrite(LED_PIN, HIGH): Turns on the LED if the sensor value is LOW (indicating an object is detected).
- digitalWrite(LED_PIN, LOW): Turns off the LED if the sensor value is not LOW (indicating no object is detected).
- delay(100): Adds a 100 milliseconds delay to the loop to stabilize the readings.
Step 4: upload the sketch
First ,copy the code and paste it, then click on the checkmark icon (✓) on the top left corner of the IDE to verify that your code compiles without any errors.
Go to the "Tools" menu and select the appropriate board type ( Arduino Uno, Nano, etc...)
Then go to "Ports"submenu and select the port to which your Arduino board is connected. On Windows, it appears as COMx, and on macOS, it appears as /dev/cu.usbmodemxxxx.
Once the correct board and port are selected, click on the right arrow icon (→) next to the checkmark to upload the sketch to the Arduino board.
Use of a battery
The circuit that you have made is powered by your computer via the USB port.
If you want to power your arduino with 9V battery, make sure the positive terminal is connected to "VIn" pin in arduino and the negative terminal connected to "Gnd" pin .
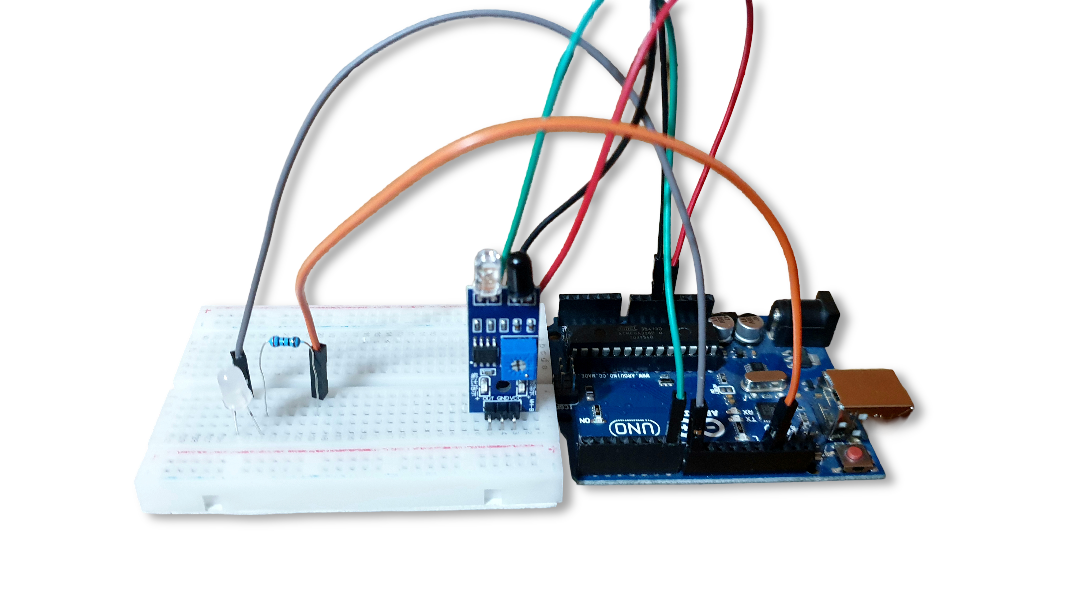
Step 5: test the circuit
Once the sketch is uploaded, you should see the Led turning on when you put your hand above the IR sensor module, and make sure when you remove your hand the led turned off.
If you want to adjust the sensivity of the IR sensor module turning the potentiometer clockwise to make the digital IR sensors more sensitive, allowing it to detect obstacles a lot easier. And turn the potentiometer counter clockwise to make the digital IR sensors less sensitive,
That's it! You've successfully uploaded a sketch to use an IR sensor module to control an LED with arduino Uno.
